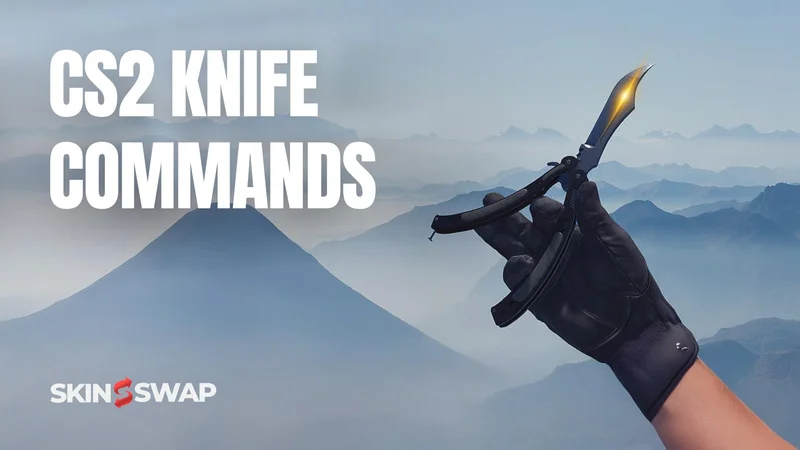
CS2 Knife Commands | How to Test Any Knife in CS2
Counter-Strike 2 (CS2) has transformed the way players experience weapon skins, animations, and customization. Among all cosmetics, knives stand out as the most iconic and valuable. They aren’t just tools for close combat - they are status symbols, fashion pieces, and in many cases, expensive digital collectibles. Adding a unique knife can make your loadout more stylish, letting you showcase your personal flair in every match. Because of their prestige and high cost, many players want to try out different knives before deciding which one fits their style. In addition to their visual appeal, using a knife for a kill in close combat can be a display of skill and have a big impact on the game.
That’s where CS2 knife commands come into play. These developer console commands allow players to instantly swap their in-game knife models, test animations, and see how each blade looks in their hands - all without spending a cent on the Steam Market. In this guide, we’ll explore why knife testing matters, how to set up your game for commands, the exact steps to use them, a full list of knife IDs, and tips to get the most out of your testing experience.
Why Players Test Knives in CS2
The appeal of knife skins and animations
Knives in CS2 aren’t just functional. Each model comes with unique animations, draw styles, and inspect sequences. The Butterfly Knife flips dramatically in your hand, the Karambit has a menacing spin animation, and the classic knife features its own distinct animation style. These animations alone often dictate which knife a player prefers, since they directly affect how the weapon feels during gameplay. Testing knives allows players to see if the flair matches their taste.
High cost of knives on the CS2 market
Unlike common weapon skins, knives are some of the most expensive items in CS2. A vanilla Butterfly Knife can cost several hundred dollars, while rare skins like the Karambit Blue Gem can reach tens of thousands. With such prices, it makes no sense to buy blindly. Commands give players a preview - a way to confirm whether the knife’s feel and motion justify its price tag.
Trying before buying - how commands save money
Think of knife commands as a free trial. Instead of committing real money, players can instantly test every knife model, from the Bayonet to the Skeleton Knife. While commands don’t generate skins or special finishes, they let you see the raw knife model in action. This “try before you buy” method saves countless dollars and ensures smarter purchasing decisions.
Preparing Your Game for Knife Commands
Enabling the developer console
Before you can test knives, you need access to the developer console. Open the main menu, go to Settings > Game > Enable Developer Console, and set it to “Yes.” By default, the console opens with the ~ (tilde) key, though you can rebind it in keyboard settings. This console is your gateway to all knife-related commands.
Starting an offline game or private server
Knife commands don’t work in ranked matchmaking or official servers. That’s because Valve disables cheat commands online to maintain fairness. To use knife commands, create an offline game with bots or start a private lobby with cheats enabled. After creating your offline game, you can load a specific map by opening the console and typing map followed by the map name (for example, map de_dust2). These environments are safe - no VAC bans, no risk - just your own test playground.
Turning on cheats (sv_cheats 1) safely
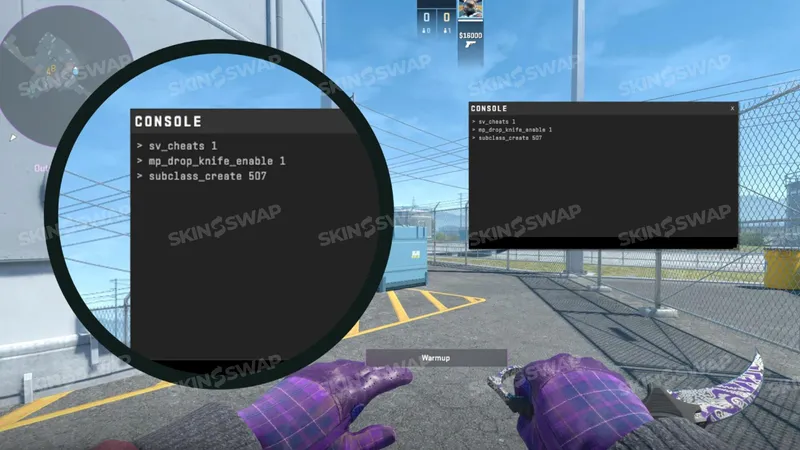
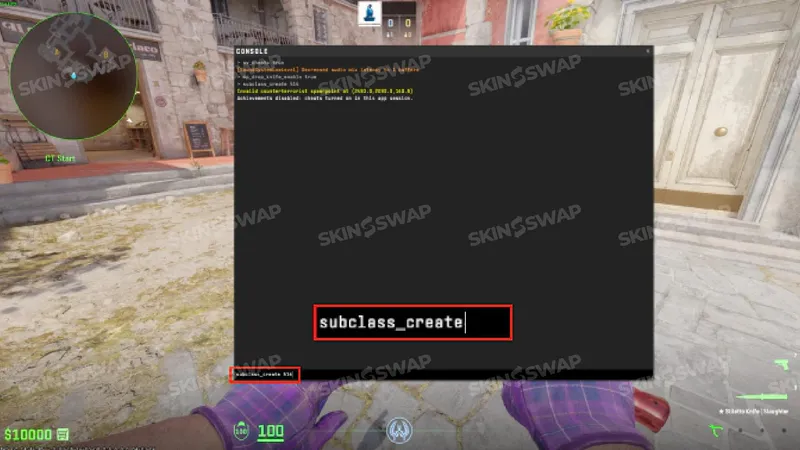
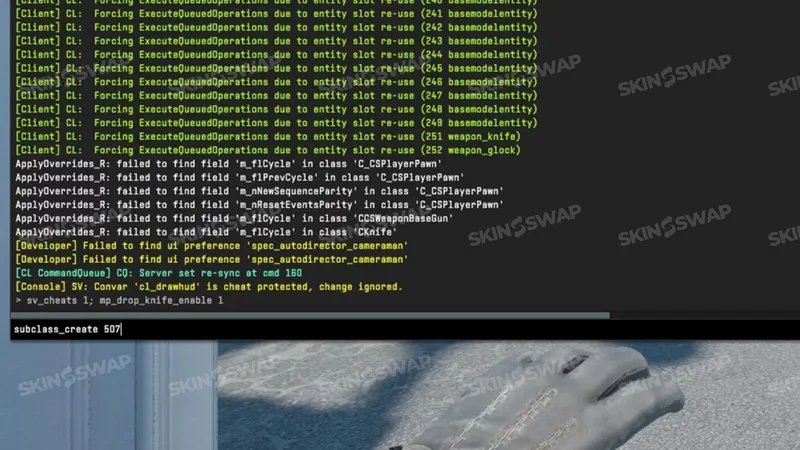
Once inside your offline or private server, open the console and type: sv_cheats 1. This is how you enable cheats in CS2.
This line activates cheat mode, which unlocks commands like knife swapping. Importantly, sv_cheats only works offline or in lobbies you control. You cannot activate it in competitive games. Rest assured, enabling it on your own server will not get you banned.
Core Knife Commands You Need to Know
To begin customizing knives in CS2, enter the following command as the first step.
Testing knives in CS2 is not complicated, but it does require the right sequence of commands. Using specific console commands allows you to customize and test different knives. If you skip one, the rest won’t work. Here are the essentials:
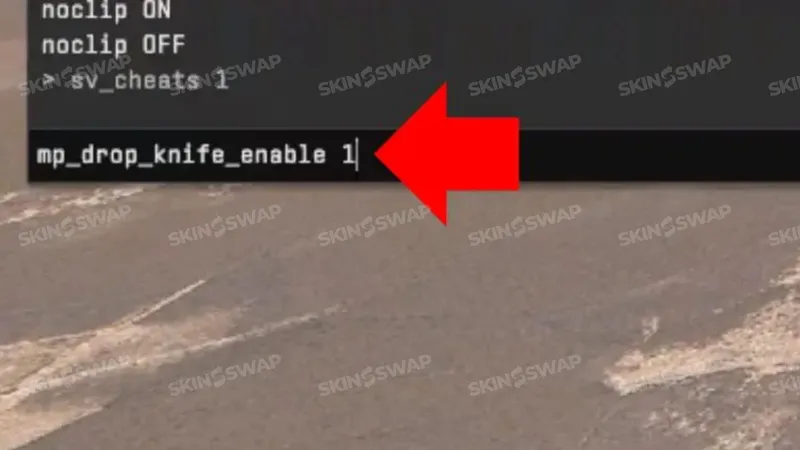
mp_drop_knife_enable 1 - dropping knives
By default, CS2 does not allow players to drop their knives. This makes sense in competitive play, but when testing, you need the ability to swap knives freely. That’s where this command comes in: mp_drop_knife_enable 1.
Once entered into the console, this unlocks the ability to drop your knife just like any other weapon by pressing G. Without this step, you’ll never be able to replace your knife with another model.
The difference between subclass_change and subclass_create
After enabling knife drops, you need a way to spawn new models. CS2 offers two related commands:
- subclass_change [ID] → This replaces the knife you dropped with the chosen model. It’s simple and reliable: drop your knife, look at it, and then run this command with the right ID number.
- subclass_create [ID] → This spawns a new knife in front of you. You then pick it up as if it were lying on the ground.
Both commands work, but subclass_change is often preferred because it directly modifies the dropped knife rather than creating a duplicate.
Why give weapon_knife_* no longer works in CS2
Veterans from CS:GO might remember using commands like give weapon_knife_karambit. In CS2, this syntax is outdated and will return an error. Valve’s new Source 2 engine handles knife models differently, so the only functional method now is through subclass_change or subclass_create. Any guide that still recommends giving commands is likely based on old CS:GO mechanics.
Step-by-Step Guide to Testing Any Knife
Now that you understand the commands, here’s a practical walkthrough.
Dropping your current knife
After enabling mp_drop_knife_enable 1, drop your knife with the G key. This is the default knife you start with in CS2. The model will appear on the ground in front of you. This step is necessary, since the game only lets you apply subclass commands to a dropped knife.
Entering the correct command
Open your developer console and type: subclass_change [ID].
Replace [ID] with the specific number tied to the knife you want (see full list below). For example, if you want a Karambit, you’ll type subclass_change 507. If you’d rather use the create method, type: subclass_create [ID].
This will spawn the knife near your feet.
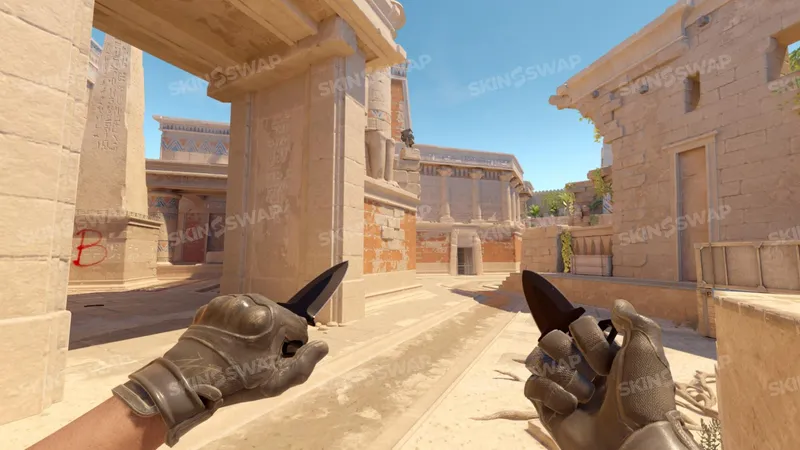
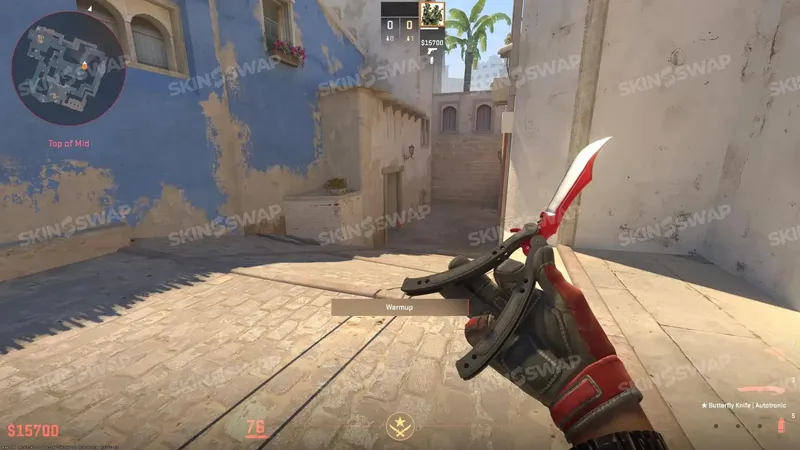
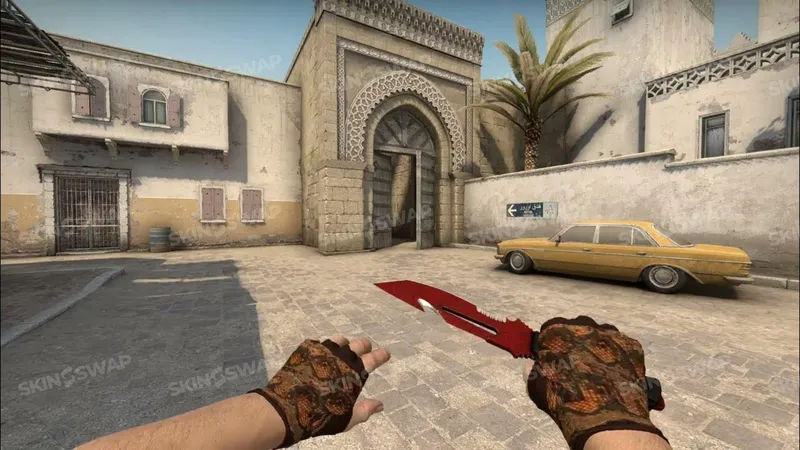
Picking up the new knife and checking animations
Once the knife has changed, walk over it to equip. Immediately, you’ll see its distinct draw animation, and the knife will pop onto your screen or make a sound cue, confirming the switch was successful. Press F to inspect and trigger unique spin or flip motions. Try running, jumping, or swinging the knife to experience its animation set in different contexts.
This hands-on process is the most accurate way to judge which knife feels “right” for you.
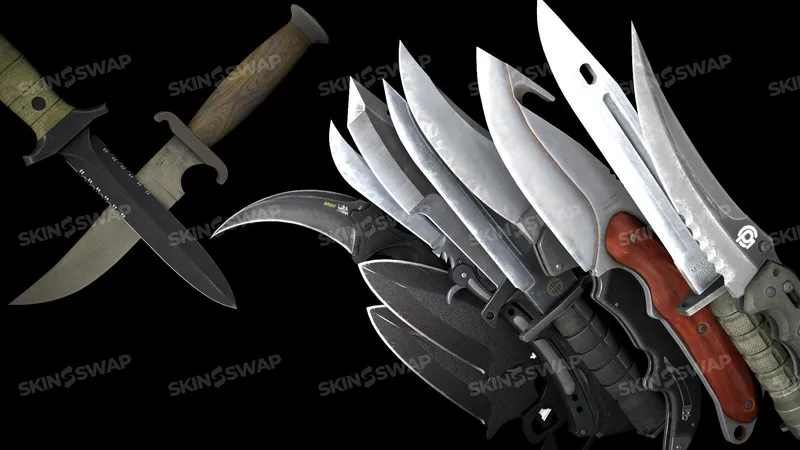
Complete List of CS2 Knife IDs and Commands
Here’s the full breakdown of all available knives and their command IDs. Use these numbers with subclass_change or subclass_create.
| Knife Name | Command Example | ID |
|---|---|---|
| Bayonet | subclass_change 500 | 500 |
| Flip Knife | subclass_change 505 | 505 |
| Gut Knife | subclass_change 506 | 506 |
| Karambit | subclass_change 507 | 507 |
| M9 Bayonet | subclass_change 508 | 508 |
| Huntsman Knife | subclass_change 509 | 509 |
| Falchion Knife | subclass_change 512 | 512 |
| Bowie Knife | subclass_change 514 | 514 |
| Butterfly Knife | subclass_change 515 | 515 |
| Shadow Daggers | subclass_change 516 | 516 |
| Paracord Knife | subclass_change 517 | 517 |
| Survival Knife | subclass_change 518 | 518 |
| Nomad Knife | subclass_change 519 | 519 |
| Skeleton Knife | subclass_change 525 | 525 |
| Stiletto Knife | subclass_change 522 | 522 |
| Ursus Knife | subclass_change 520 | 520 |
| Navaja Knife | subclass_change 520 | 520 |
| Talon Knife | subclass_change 523 | 523 |
| Kukri Knife (new) | subclass_change 526 | 526 |

Limitations of Knife Commands in CS2
Only offline or private matches
Knife commands are strictly limited to private or offline games. You cannot load into a ranked Premier match, type sv_cheats 1, and expect it to work. Valve has built these restrictions into the Source 2 engine to ensure competitive integrity. So, if you’re testing knives, always do it in a bot match or on a custom private server.
No skins - vanilla knives only
Another major limitation is that knife commands only spawn vanilla models. This means you can test the basic Karambit or Butterfly Knife, but you won’t see skins like Doppler, Fade, or Blue Gem. To preview skins, you’ll need to use Steam’s “Inspect in Game” feature or join community servers that simulate skins.
Why this won’t work in matchmaking or official servers
Valve disables all cheat-related commands in official servers. If you attempt knife commands there, you’ll either get an error message or nothing will happen. This isn’t a bug - it’s by design. Knife testing is meant as a practice tool, not a competitive feature.
Alternative Ways to Test Knives
Using skin servers or community servers
Many community servers exist where players can try out different knives and skins. These servers often use plug-ins that simulate skins, giving you access to popular finishes without owning them. While not officially supported, they are a good way to experience how a knife looks with its rarest patterns.
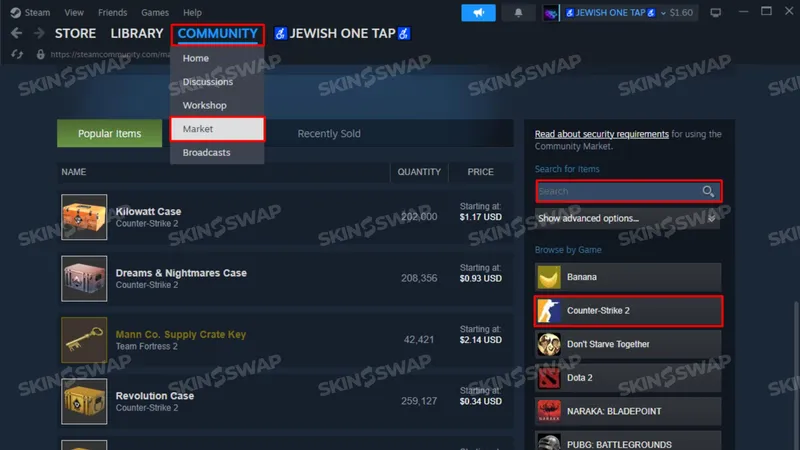
Inspecting skins in the Steam marketplace
The simplest official method is using the Steam Inspect feature. When browsing knife skins in the Community Market, click “Inspect in Game.” This loads the skin into your CS2 client and lets you spin it around. While you can’t use it in live play, it’s a reliable way to preview patterns and finishes.
Watching demos and pro matches for animation references
Professional players often use high-end knives. Watching their demos or live matches is an indirect way to study knife animations. For instance, you might see how a Karambit spins when pros inspect it mid-round. It won’t replace hands-on testing, but it gives you another perspective.
Common Issues and Fixes
Knife command not working - possible reasons
If your command isn’t functioning, check for these mistakes:
- Did you type sv_cheats 1 first?
- Did you enable mp_drop_knife_enable 1?
- Are you in offline/private mode?
Correcting these usually resolves the issue.
Team restrictions (T vs CT bug)
Some players report that certain knife models don’t spawn correctly when on the Counter-Terrorist side. The quick fix is to switch to Terrorist before running the command.
Console not opening or cheats not enabled
If your console doesn’t appear, double-check settings: Enable Developer Console = Yes. If it still won’t open, rebind the key in Keyboard Settings. And remember - without sv_cheats 1, no knife command will ever work.
Safety and Fair Play
Can you get banned for using knife commands?
No. As long as you’re offline or in a private server you control, using knife commands is completely safe. VAC bans are only triggered by third-party cheating software, not by in-game console commands in private sessions.
VAC and offline vs online restrictions
Valve Anti-Cheat (VAC) ignores offline activity. Commands are whitelisted in this mode, so you can test freely. If you enter them online, they simply won’t run. There’s no risk of being flagged.
Why Valve allows these commands for practice
Valve recognizes that players want to test models before buying. By restricting commands to non-competitive environments, they provide flexibility without risking the fairness of ranked games. It’s a balance between creativity and competitive security.
Tips to Maximize Your Testing Experience
Best maps for testing knife movement (aim map, workshop maps)
Choose wide, open maps like aim_training or empty workshop arenas. These maps give you space to sprint, jump, and slash freely, allowing you to see full animation cycles.
Adjusting viewmodel settings for better inspection
If you want to bring knives closer to the camera or change their angle, try: viewmodel_offset_x 2, viewmodel_offset_y -2, viewmodel_offset_z -2.
Experiment with these numbers until your knife appears exactly how you want it on screen.
Recording knife animations with demo tools
Use the record command to capture your knife testing session. Later, play it back with demo tools to compare knives side by side. This is especially useful if you’re deciding between multiple expensive purchases.
Final Thoughts on CS2 Knife Commands
Why testing knives is worth it
Knives are more than just melee weapons in CS2 - they are digital fashion statements and investments. With prices that rival real-world luxury goods, it makes sense to preview them thoroughly before making a decision. Knife commands offer that opportunity, giving players a safe, cost-free way to test every model in the game.
The balance between practice and purchase decisions
While knife commands let you try the models, they don’t provide skins or rare finishes. At the end of the day, if you want a Doppler or a Lore skin, you’ll need to buy it from the market or open it from a case. But using commands first ensures that when you do invest, you’ll choose a knife model you genuinely enjoy.